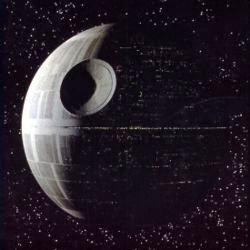
So I ended up playing this scenario at GR, one of my local gaming shops. The gist of the scenario is simple and is a team game. One side plays the rebels who have to storm the deathstar and destroy it within 10 turns while the other plays the courageous Empire, standing up for themselves. Guess which side I took...
Anyway, the army lists are fixed for both sides with the rebels having a set number of Wave 1 ships while the imperials have respawning mook TIE fighters. However, there is a set number so once that number is out on the field, nothing else will spawn the next thing unless a nameless mook dies.
The Rebel ships are all armed with proton torpedoes and the aim of the game is to try and successfully fire off one into the death star exhaust port down in the trench. This requires them to fly above the trench, go down into it with one movement, and getting ready to fire the torpedo as they slowly advance down the trench. You'll notice the red/blue squares on the trench later on, which represent different zones. The rebels progress steadily from zone to zone. Unlike normal proton torpedoes, you only get to roll 1 dice to hit unless your action during the action phase is to lock on target. This gives you a bonus die, which is cumulative. Once you take a point of hull damage, you're forced out of the trench and you'll have to try again. You can choose to either shoot from right next to the port and pray you hit with one dice or slowly go down the trench to increase your dice pool and your odds. Also, you need an unsaved critical to count as scoring a hit against the port while the port has 3 defense dice.
So on with the game.
The Empire gets to place 4 TIE fighters; 2 PS (Pilot Skill) 1s and 2 PS 4s, anywhere on the board. This is to represent a random patrol of TIE fighters who are suddenly surprised by the appearance of the Rebels. The rebels all start from behind the yellow line on the map. Needless to say, the 4 TIE fighters are pretty outnumbered at the beginning and VERY badly outgunned. The first round of shooting is brutal,the damage to the Empire is mitigated only by the fact that we're still at range 3 of each other so we get to roll 4 dice for defense. I do get lucky with my TIEs and take down a Y-wings shield as well as dealing 1 critical hull damage to it.
The turrets also get to shoot but their attack value is only 1. Which means they don't hit most of the time.
During the second turn, the 2nd (out of 3) waves comes in. This consists of several more PS 1 and 4 TIE Fighters. And off we go, to the defense of our beloved death star. I manage to get hit by an ion cannon after doing a 4 spd U-turn and I actually miss hitting the Y-wing at range 1. Ugh. My other TIES fly up to try and intercept them.
It's only during turn3 that the named characters start appearing. Such as Darth Vader, Backstabber and that PS7 named TIE fighter pilot whose name I forgot. The Empire has taken heavy casualties while the Rebels have only lost one Y-wing. They're also getting ready to start their descent into the trench. My risky manuever fails as I try to shuffle behind the rebels with another 4 spd u-turn but I end up being in front of them instead. Oh no!
A brave Y-Wing slowly starts its run down the trench. Thankfully, there are turrets at the bottom to try and destroy it. However, they all miss it. The battle keeps getting fiercer and fierce as furious dogfights break out both on top and below in the trench, with each side trying to force the other up. Right when things seem to be turning in the Empire's favor....Han Solo shows up.
Wedge dies to a swarm of TIE fighters while Darth Vader evades Han Solo. Soon, almost all the ships that are available are running down the trench. The first X-wing tries to score a critical hit on the port. It fails even with 3 dice (due to 2 locked on targets). It is then forced to come up where it is shot apart by respawning TIE fighters. A Y-wing tries again, but fails even with 5 dice. This just wasn't meant to be.Until finally, it's just Luke Skywalker who can make the shot. It's nearing the 10th turn and this is probably the last chance for the Rebels. Can he do it?
Yes, he does! With only 3 dice, he scores THREE critical hits! It's unbelievable! The death Star blows up and the filthy Rebel scum win!
It's an utterly cinematic ending to three hours of dog-fighting. The Empire players can only quietly mutter under their breaths 'Not again' while the Rebels whoop and cheer.


No comments:
Post a Comment